Garrattfan's Modelrailroading Pages
MDC 3tr Shay
Various details of the superstructure
January 17 & 18, 2006
With the superstructure gradually approaching its completion it was about time I should pay some attention to some flaws.
First the original kit leaves a wide open hole behind the steam engine and the drivers cab. It isn't easy to miss that hole, not even you only take an occasional look at the model. So I decided to close it. I used 0,4 mm styrene sheet and cut it more or less to size. The long sheet behind the steam engine was glued with ACC because it had to be fixed to metal. The other two, the backside and the top were glued with MEK. After ample dry time I cut and sanded the sheets to size.

The sheets to close the gap behind the steam engine and the cab.
Note the small sheet of styrene on the other side, which was used to close a small but conspicuous slit between boiler and cab.
Other work left to be done was more or less caused by the work of the previous owner. He had glued the handrail on the rear pilot and used simply too much glue. I removed the handrail with some persuasion, removed the glue with a glass fibre pencil and replaced the handrail.
 |
 |
||
| Before | After |
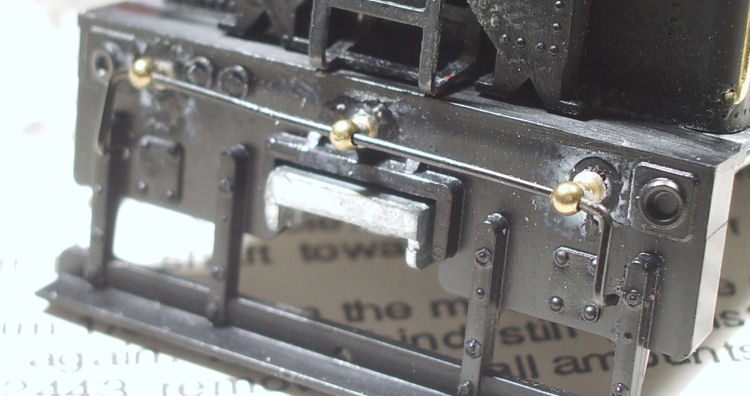
The steps beneath the drivers cab also needed attention. On both sides the steps had previously been glued to the frame and both had broken off again in the subsequent struggle to build the model. On the left side the steps could simply be glued to the frame again. But on the right the steps were too far away from the frame girder to use it for support. So I drilled out the original holes, inserted two pieces of 1,0 mm brass wire, cut the wire short with flush cutting nippers and glued the steps to it. Due to this the steps moved a little outward but I accepted this little impurity.


Finally I turned my attention to the handrail on the boiler. As you can see from the photo this handrail did not run parallel on both sides. I removed the handrail stanchions and cleaned the holes from any glue. Then I drilled the rear holes deeper and tried to position the stanchions anew until the wire ran almost parallel. Only then I fixed the stanchions with fresh ACC glue

No need to say that this is not parallel
 |
 |
||
| Use a pin to manipulate the stanchion. They are very small and easily buzz off from your pliers, keeping you occupied for many a unhappy time to retrieve them from anywhere in your room. If you use a pin, you can insert pin until the stanchion is completely snug, giving you sufficient room to work on them. | |||

Much better!!

Sign my
GuestBook